Climber | Entrepreneur | Designer
Recent Projects


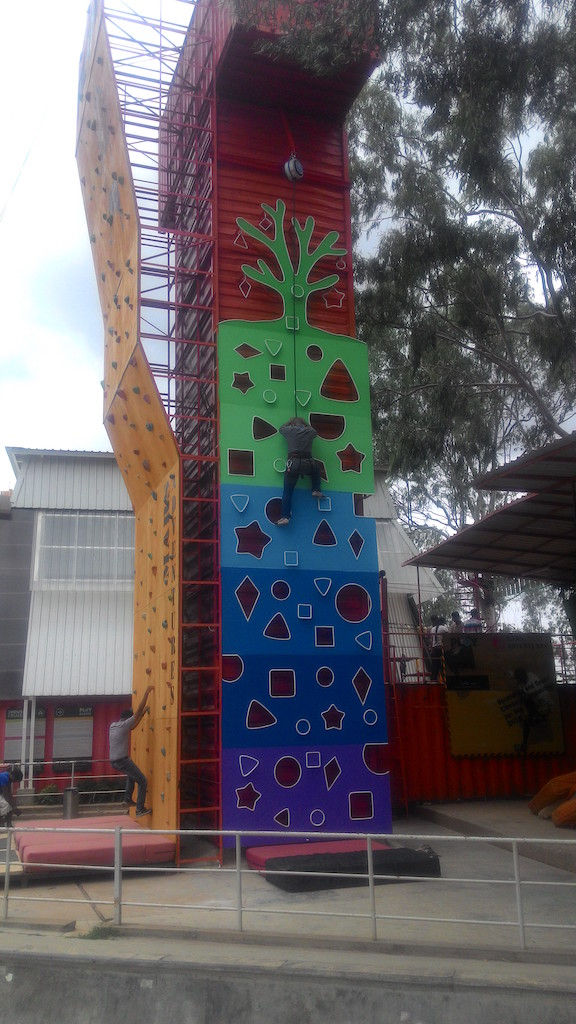


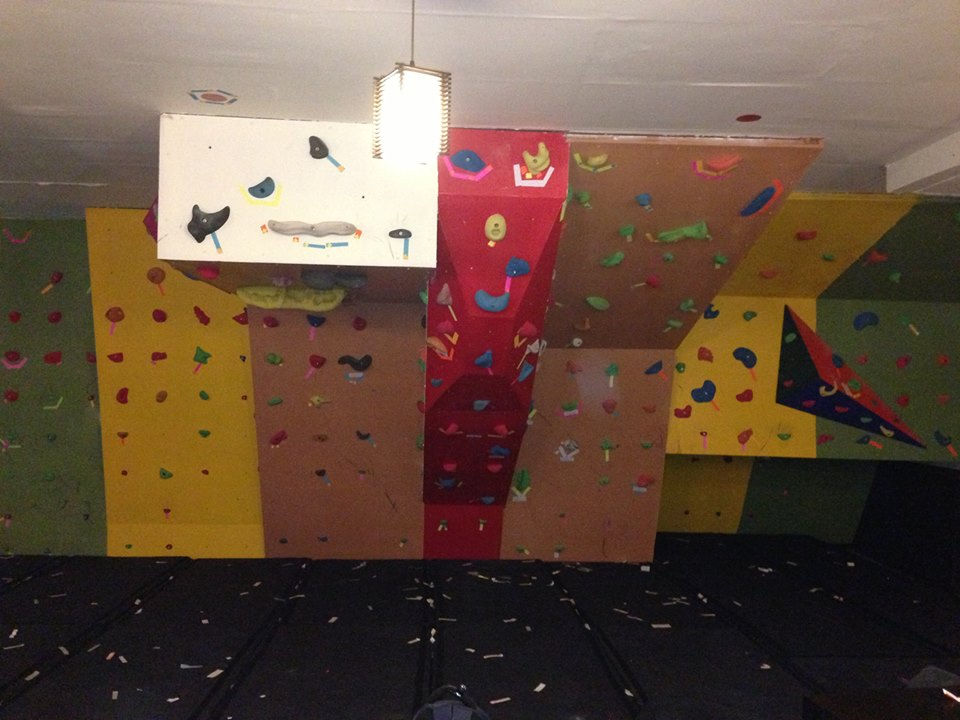


FeetOffGround - Custom Climbing Walls
All climbing walls designed for various clients as part of FeetOffGround.
Mini Mighty - Ready to Install climbing wall for kids
The Mini Mighty is a pretty serious bouldering wall for children from 0-9 years old. It was conceptualised as a climbing wall that grows with your child.
Most parents are apprehensive of investing a large sum of money on a product that their child will grow out of soon. The Mini Mighty comes in a 4 ft version for the very young, after which you can add the third panel extending the height to 6 ft and add a fourth panel further to extend the height up to 8 ft.
The Mini Mighty was designed as a DIY-ready climbing wall. For all the DIY enthusiasts, installation only involves drilling and anchoring the ready-to-install panels of the Mini Mighty onto a backing wall.


Tractor Hood Barbeque Grill
On one of my first few trips to the scrap market, I spotted a used hood of a tractor. I didn't know what I wanted to do with it then, but I bought it.
At first, my idea was to make a table out of it, but later I decided to make it into a barbecue grill.
I'm vegetarian, so, I wasn't using it much and when I found the right couple to give it to, I had it repainted and gifted it to them.
Describe your image.
Describe your image.
Describe your image.
Describe your image.
TRACTOR HOOD BARBECUE GRILL
On one of my first few trips to the scrap market, I spotted a used hood of a tractor. I didn't know what I wanted to do with it then, but I bought it.
At first, my idea was to make a table out of it, but later I decided to make it into a barbecue grill.
I'm vegetarian, so, I wasn't using it much and when I found the right couple to give it to, I had it repainted and gifted it to them.
INVENTURE ACADEMY CLIMBING WALL


Bearings, gear ratios, worm and worm wheel, gear boxes, vices, omega shackles, c-clamps, hubs, elbow joints….these are some of the terms eighty fifth graders were exposed to during their project week at Inventure Academy, Bangalore. I can say with some certainty, many adults haven't heard most of these terms and/or don't know what purpose they fulfil.
Inventuring is what this first week of school is called - the week that in 2016 happened to fall on the16th through the 20th of May. In a span of five days, two hours each day, these ten year olds completed three pretty amazing projects….and how.
The first project was meant to be a climbing wall measuring 30 feet wide and 10 feet tall. The wall needed to be fitted with ninety odd “holds”. Normally, holds are made from polyurethane and sand and come in assorted sizes, colours and shapes. They are meant to replicate holds on real rock.
I had envisioned the climbing wall for the Inventuring project to be an extended Play System. And my obsession with industrial themes made me suggest that we use industrial scrap metal found in the local gujari (scrap yard behind Townhall in Bangalore) as holds on the climbing wall. I decided to split the climbing wall into 3 panels: Re-purposed cycling components, Snakes and Ladders theme and Industrial theme.
So, the first week of May 2016 saw me spend lengthy hours at the gujari, buying old machine components that could be used as holds to climb. By the end of each day, I was smelling like dried up grease. Now that we had the components, we had one week to prep them so that ten year olds would be able to actually build a functional climbing wall using them. This meant, welding pulleys blocks so they don't move, adding metal flats to cycling hubs, welding pedals on the crank arm so it doesn't rotate and so on. Additionally, we needed to make sure there was nothing sharp on any of the components.
With my climbing knowledge and experience in building walls, I assembled these prepped components on a white flex placed on the floor cut to scale of the actual climbing wall to see which component would serve well as a hold in which position. Bindu came up with an idea was to show a picture of this arrangement to the kids and get them to mark out the holes on the actual climbing wall. My fabricator (whom I’ve been working with for over 10 years now) and his team were going to be drilling holes, live, on the wall. The kids would then be told what size of bolts and nuts they needed and were going to use allen keys and spanners to tighten the holds into position.
This was the plan and I am proud to say the children didn't disappoint. When it came down to execution, we took extreme care that no power tools were handled by the kids and that they were a safe distance away when drilling was in progress. But the challenge was that there were 40 kids allocated to building the climbing wall and we needed to keep them all engaged at once. Again Bindu came to the rescue. She had planned to split the group internally into three and we handed out water based enamel paint to fifteen kids and sent them away painting a chequered pattern on the snakes and ladders theme wall that keep them busy for two full days. We handed the prepped cycling components to a bunch of ten kids and asked them to work at fitting them into the first panel. And the remaining ten set out to place and fit forty five industrial components according to the picture shown to them. It all seemed overwhelming to me at first, but the kid’s enthusiasm made it easy. After day 1, they eased into a rhythm and didn't really need help. By end of day 4, they were done and on day 5 we got them to climb the walls they had built.
This was forty kids. Simultaneously we had forty more kids working on two other projects.
INVENTURE ACADEMY KINETIC SCULPTURE


Ever since I came across Jean Tinguely’s kinetic art forms on Pinterest, I had been meaning to build one. Something about moving objects keeps an audience engaged and I wanted to be the guy engaging them. I had no clue where to start, but this project I took up during the Inventuring week gave me direction and much needed motivation. I had very boldly proposed that we would have the children build an actual functional kinetic sculpture, but I had never built one before.
Being an engineer, I had visualised the entire mechanism; but I never could have anticipated the challenges involved in building something with eighty odd moving components. I knew that I wanted to use a bicycle to drive the kinetic sculpture, but how and what needed to move was a total mystery.
Week one went by in imagining, drawing rough sketches on paper, then preparing scaled models on a computer. Little work went into actual procurement of moving components. When I did settle on a design, I went back to the trusted gujari. I knew that I wanted the rotating components to move in opposite directions and at different speeds. I also knew that one straight forward way to accomplish this was to use gears. So, off I went purchasing different sized gears. The gujari however only has used components. This meant that I need to match different sized gears with different shaft diameters and needed to make shafts for all of them.
I ran to the lathe operator and asked the guy for help. I got nothing but complaints on how complicated the task was and how it couldn't be done in under a week. I sought help from my father and using one of his contacts, managed to procure and produce fifteen identical shafts that would accommodate all the different sized gears in two days. This made life a little easy.
Heading back to my fabricator’s workshop, we built the frame that was to house these shafts and gears. We purchased bearings to make sure they rotate with minimal friction, since the entire lot was to run on a very long bicycle chain and finally was to be driven by kids peddling a bicycle. It took a lot of work and many sleepless nights to come up with a final design but we put it all together two days before the start of project week.
This was only a partial victory. We now needed to know how easy or hard to make it for the fifth graders. Since something like this hadn’t been done before, no one could help me with their experience. We just went with what we thought would work best, dismantled the entire assembly and prayed that it would be easy enough for the kids to put them all back.
When we brought the frame to the school on day 1 and explained what the kids had to do, it wasn’t received too well. But Bindu and me had planned to keep them occupied over the first two days in prep work. So, we had deliberately left some components unfinished and asked the kids to make the fans and spirals look colourful. They painted their school’s core values on wood and fitted them onto rings that would be attached later to the shafts which were housed in bearings.
The kids were told which were the driver and which were the driven gears and were asked to count the teeth on the gear wheels to arrive at the gear ratios. They were asked to place the bearing housing onto the frame and bolt them in place. They then were told to fit all the second layer of components: the rings, the fans, etc to these driver and driven shafts.
It was now the moment of truth. We attached the chain to all the diver gear shafts and pulled it with our hands. They all moved together pretty well. Day 4 saw the fully assembled kinetic sculpture erected on a wall 12 feet high. This meant that on day 5, the bicycle was fitted and for the first time we pedalled it and the sculpture actually moved. It had worked despite us never having tested it.
INVENTURE ACADEMY PAINTING MACHINE
Fifteen kids from our Inventuring project week were allocated the task of building a “painting machine” and paint something with it. The task was clear: a canvas measuring 6 feet wide by 8 feet tall was to be erected on a wall 12 feet above ground. They needed to build a “machine” that could enable them to use paints and paint brushes to create art. Abstract art, since the machines only had linear and rotatory motions.
I had designed and fabricated the so called machines over the first two weeks of May, but hadn't tested them. I bought lengths of rope and handed it over to the kids on day 1. They needed to plan, cut the appropriate lengths of rope, colour code the ropes and machines and use the ropes to move the machines that were fitted with the paint brushes across the canvas.
This project I must admit gave me sleepless nights, both during the planning and fabrication phase and during execution. During planning, I remember changing the design just two day before we needed to start. I had had terrifying dream where the children dropped the heavy machines because they let the rope slip through their hands. While taking strolls in my living room at 2:00 am wondering what the best way to make it safe was, I decided to use a climbing rope with a Prussic (a knot used in rock climbing to assist in a rappel). This I knew would ensure that the machines wouldn't fall if the rope slipped out of the hands of the kids. I only needed to make sure that I had a solid enough anchor. We had to improvised by getting kids to fill in mud from the nearby gardening project into buckets with pillars in them. These proved to be good enough anchors and the painting machine was up, the canvas erected on day 2.
Day 3, the kids began using the machines and there was chaos. Coordinating among themselves was a huge challenge, but the teachers helped. Once the kids got a hang of it though, day 4 and 5 were a breeze. We swapped paint and paint brushes with markers on day 5, so that it would add more colour and form to the painting. And it sure did.
MINI MIGHTY - KID'S CLIMBING WALL
The Mini Mighty is a pretty serious bouldering wall for children from 0-9 years old. It was conceptualised as a climbing wall that grows with your child.
Most parents are apprehensive of investing a large sum of money on a product that their child will grow out of soon. The Mini Mighty comes in a 4 ft version for the very young, after which you can add the third panel extending the height to 6 ft and add a fourth panel further to extend the height up to 8 ft.
The Mini Mighty was designed as a DIY-ready climbing wall. For all the DIY enthusiasts, installation only involves drilling and anchoring the ready-to-install panels of the Mini Mighty onto a backing wall.
FEETOFFGROUND - CUSTOM CLIMBING WALLS
All climbing walls designed for various clients as a part of FeetOffGround.


FEETOFFGROUND - Play Systems
All play systems designed for various clients as a part of FeetOffGround.
Describe your image.
Describe your image.
Describe your image.
Describe your image.
Playline - Play System
Like an ECG is a visual for a Lifeline, this play system has a continuous line that transforms into various play elements as it meanders its way through across a small floor space - hence the name Playline.